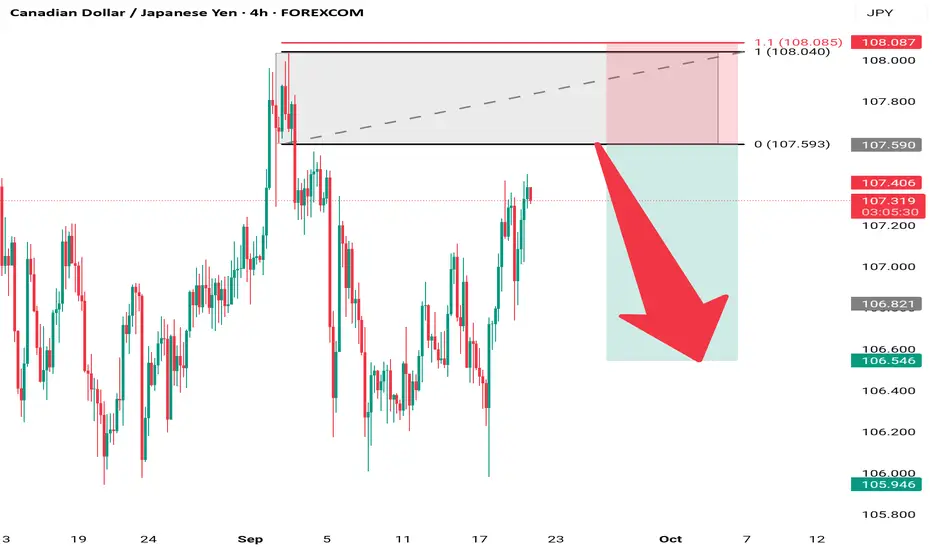
Entry Zone (Supply Area):
Around 107.59 – 108.08 (highlighted grey box).
Price is expected to react bearish from this resistance zone.
Stop Loss:
Just above 108.08 (top of the supply zone).
This protects against a breakout continuation.
Target Zone:
Around 106.00 – 105.95 (lower green box).
This is the projected support area.
📉 Trade Idea
Bias: Bearish (short).
The red arrow suggests that price may reject from the supply zone and head lower.
Risk-to-reward (RRR) looks favorable, roughly 1:2.
🧠 Technical Rationale
1. Supply Zone Rejection:
Price is retesting a prior resistance zone where sellers have stepped in before.
2. Trend Structure:
On the 4H chart, CAD/JPY is in a corrective rally after a bearish move — this could be a retracement before continuation down.
3. Candlestick Behavior:
If bearish rejection candles (e.g., wicks, engulfing) form near 107.80 – 108.00, it strengthens the short bias.
Trade active
Trade closed: target reached
final target of 1:2 hit.Trader 📈 | Analyst 🧠FX | Indices. Strategy + Patience = Profit.
Disclaimer
The information and publications are not meant to be, and do not constitute, financial, investment, trading, or other types of advice or recommendations supplied or endorsed by TradingView. Read more in the Terms of Use.
Trader 📈 | Analyst 🧠FX | Indices. Strategy + Patience = Profit.
Disclaimer
The information and publications are not meant to be, and do not constitute, financial, investment, trading, or other types of advice or recommendations supplied or endorsed by TradingView. Read more in the Terms of Use.