Trading Discipline with Biofeedback1. Introduction: Why Trading Discipline is Hard
In the world of financial markets, traders are constantly balancing analysis with emotion. Charts and data may look purely rational, but the human brain does not operate like a spreadsheet. Instead, traders face fear, greed, overconfidence, hesitation, and impulse — all in rapid cycles during market hours.
Trading discipline is the ability to execute a trading plan consistently, without being swayed by emotional impulses or external noise. It’s what separates a professional who survives years in the market from someone who burns out after a few months.
The challenge? Even the best-prepared trader can watch their discipline crumble in moments of market stress. This is where biofeedback comes in — a method for measuring and controlling physiological responses to improve self-control and decision-making under pressure.
2. What is Biofeedback in the Context of Trading?
Biofeedback is a technique where you use electronic monitoring devices to measure physiological functions — like heart rate, breathing rate, muscle tension, skin conductance, and brainwave activity — and then use that real-time data to learn how to control them.
In trading, biofeedback can help you:
Recognize early signs of stress before they impact your judgment.
Maintain an optimal arousal level for peak performance.
Train your nervous system to remain calm in volatile situations.
Develop habits that strengthen mental resilience over time.
Example:
A trader using a heart rate variability (HRV) monitor might notice their HRV drops significantly before a losing trade — a sign of rising stress. With practice, they can use breathing techniques to restore calm and prevent impulsive decisions.
3. The Science Behind Biofeedback for Traders
3.1. The Stress-Performance Curve
This is based on the Yerkes–Dodson Law, which shows that performance improves with physiological arousal — but only up to a point. Too little arousal (low alertness) leads to sluggish reactions; too much (high anxiety) causes poor judgment.
Biofeedback helps traders stay in the optimal performance zone — alert but calm.
3.2. Physiological Markers in Trading
When you place a trade or watch a volatile market, your body activates the sympathetic nervous system ("fight-or-flight" mode):
Heart rate increases → decision-making becomes reactive.
Breathing shortens → oxygen supply to the brain decreases.
Skin conductance rises → higher sweat response from stress.
Muscle tension increases → physical discomfort, fatigue.
Brainwaves shift → from alpha/theta (calm focus) to high beta (stress).
This physiological shift can override logic. Biofeedback helps you detect these changes before they hijack your behavior.
3.3. Neuroplasticity and Habit Formation
Biofeedback training taps into neuroplasticity — the brain’s ability to rewire itself through repeated experience. By pairing specific mental states (calm focus) with trading activities, you strengthen neural pathways that make discipline more automatic.
4. Why Discipline Breaks in Trading
Even with a perfect trading plan, discipline often fails because:
Emotional Hijacking — The amygdala overrides rational thought under stress.
Overtrading — Dopamine-driven urge to "chase" trades after wins or losses.
Loss Aversion — The tendency to avoid losses at all costs, leading to holding losers too long.
Confirmation Bias — Seeking only information that supports your existing trade.
Fatigue — Poor sleep or extended screen time reduces impulse control.
Biofeedback directly addresses points 1 and 5, and indirectly helps with the rest by improving awareness and emotional regulation.
5. Types of Biofeedback Tools for Traders
5.1. Heart Rate Variability (HRV) Monitors
Function: Measures beat-to-beat variations in heart rate.
Why it’s useful: Higher HRV = greater resilience and adaptability to stress.
Popular devices: Polar H10, Whoop, Elite HRV, Oura Ring.
5.2. Electroencephalography (EEG) Headsets
Function: Measures brainwave activity (alpha, beta, theta, gamma).
Why it’s useful: Identifies mental states — e.g., focus, relaxation, distraction.
Popular devices: Muse, Emotiv Insight.
5.3. Skin Conductance Sensors
Function: Measures electrical conductance of skin (linked to sweat response).
Why it’s useful: Early indicator of stress before conscious awareness.
Popular devices: Empatica E4, GSR2.
5.4. Breathing Feedback Devices
Function: Tracks breathing rate and depth.
Why it’s useful: Calm, diaphragmatic breathing maintains optimal arousal levels.
Popular devices: Spire Stone, Breathbelt.
5.5. Multi-Sensor Platforms
Combine HRV, skin conductance, temperature, movement, and EEG for a full picture.
Often integrated with mobile apps that guide breathing, meditation, or cognitive training.
6. The Biofeedback-Discipline Loop for Traders
Here’s how biofeedback fits into a trader’s workflow:
Baseline Measurement
Monitor your physiological state during calm, non-trading hours.
Establish "normal" HRV, heart rate, and brainwave patterns.
Stress Mapping
Record your physiological data during live trading.
Identify patterns before, during, and after trades — especially losing streaks.
Intervention Training
Use breathing, mindfulness, or focus exercises to restore optimal state.
Repeat until the intervention becomes automatic.
Real-Time Application
Wear biofeedback devices during trading.
Take action the moment stress markers exceed thresholds.
Review and Adjust
Analyze post-trade logs for emotional triggers and physiological patterns.
Update your discipline strategy accordingly.
7. Biofeedback Training Protocol for Traders
Phase 1: Awareness (2–3 Weeks)
Goal: Understand your physiological reactions to market events.
Action Steps:
Wear HRV and skin conductance sensors during trading.
Log market conditions and emotional states alongside data.
Identify recurring "stress spikes" and the situations causing them.
Phase 2: Regulation (3–4 Weeks)
Goal: Learn to control physiological stress responses.
Techniques:
Coherent Breathing: Inhale for 5.5 seconds, exhale for 5.5 seconds.
Progressive Muscle Relaxation: Tense and release muscles from head to toe.
Alpha Wave Training: Use EEG feedback to enter calm, focused states.
Phase 3: Integration (Ongoing)
Goal: Make emotional regulation part of your trading routine.
Action Steps:
Pre-market: 5 minutes of HRV breathing.
During trading: Monitor stress markers, take breaks if needed.
Post-market: Review biofeedback logs and trade journal together.
8. Case Studies
Case Study 1: The Impulsive Scalper
Problem: A day trader entered trades too quickly after losses, leading to overtrading.
Biofeedback Insight: HRV dropped sharply after losing trades; breathing became shallow.
Solution: Implemented 3-minute breathing reset after each loss. Over 6 weeks, reduced revenge trades by 70%.
Case Study 2: The Swing Trader with Exit Anxiety
Problem: Took profits too early due to fear of reversals.
Biofeedback Insight: EEG showed increased beta waves when price approached target.
Solution: Practiced alpha-wave breathing before exit decisions. Result: Average holding time increased by 15%, boosting profits.
Case Study 3: The New Trader with Market Open Stress
Problem: Felt overwhelmed at the opening bell, making erratic trades.
Biofeedback Insight: Skin conductance spiked dramatically at market open.
Solution: Added 10 minutes of pre-market meditation and HRV training. Result: 40% fewer impulsive trades in the first 30 minutes.
9. Advantages of Biofeedback for Trading Discipline
Objective self-awareness: Replaces guesswork with measurable data.
Prevents emotional spirals: Stops small mistakes from snowballing.
Speeds up learning: Accelerates habit formation for calm decision-making.
Customizable: Can be adapted to each trader’s unique stress patterns.
Integrates with trading journal: Creates a full picture of both mental and market performance.
10. Limitations and Considerations
Cost: High-quality devices can be expensive.
Learning curve: Requires time to interpret data and apply techniques.
Over-reliance: Biofeedback should enhance, not replace, psychological skill-building.
Privacy: Data storage should be secure, especially with cloud-based apps.
Conclusion
Trading discipline is not just a mental skill — it’s a mind-body skill. Biofeedback bridges the gap between the psychological and physiological sides of trading performance. By learning to recognize and control your body’s stress responses, you can keep your decision-making sharp, your execution consistent, and your emotions balanced even in high-pressure market environments.
Over time, biofeedback training rewires your nervous system for resilience, turning discipline from a constant battle into a natural, automatic state. And in the competitive world of trading, that could be the difference between long-term success and early burnout.
AXISBANK
Intraday Scalping & Momentum Trading1. Introduction
In the high-speed world of financial markets, two strategies stand out for traders who thrive on quick decisions and rapid results: Intraday Scalping and Momentum Trading.
While both are short-term trading styles, they differ in execution speed, trade duration, and the logic behind entries and exits.
Intraday Scalping focuses on capturing tiny price movements — sometimes just a few points — multiple times throughout the trading session.
Momentum Trading aims to ride significant price moves caused by strong buying or selling pressure, often holding positions for minutes to hours until the trend exhausts.
In both strategies:
Speed is critical.
Precision is non-negotiable.
Discipline is the backbone.
2. The Core Concepts
2.1 Intraday Scalping
Scalping is like market sniping — taking small, precise shots. The goal is not to hit a home run but to consistently hit singles that add up.
Key traits:
Very short holding times (seconds to a few minutes).
Multiple trades per day (5–50+ depending on style).
Targets are small (0.1%–0.5% price move per trade).
Relies on high liquidity and tight bid-ask spreads.
Example:
Stock XYZ is trading at ₹100.25/₹100.30.
Scalper buys at ₹100.30.
Price ticks up to ₹100.40 in 30 seconds.
Exit at ₹100.40 — profit of ₹0.10 per share.
Tools used:
Level 2 order book (market depth).
Time & sales tape.
Tick charts (1-min, 15-sec).
Volume profile for micro-trends.
2.2 Momentum Trading
Momentum trading is like surfing a wave. Once a strong move starts (due to news, earnings, sector activity, or breakout), momentum traders jump in to ride the surge until it slows.
Key traits:
Holding time is longer than scalping (minutes to hours).
Focus on directional moves with high relative volume.
Larger price targets (0.5%–3% or more per trade).
Relies on trend continuation until exhaustion.
Example:
Stock ABC breaks resistance at ₹250 on high volume after earnings.
Trader buys at ₹252 expecting further upside.
Price runs to ₹260 before showing weakness.
Exit at ₹259 — profit of ₹7 per share.
Tools used:
1-min to 15-min charts.
Moving averages for trend confirmation.
Relative Volume (RVOL) scanners.
Momentum oscillators like RSI, MACD.
3. Scalping vs Momentum — Quick Comparison
Feature Scalping Momentum Trading
Trade Duration Seconds to few minutes Minutes to hours
Profit Target 0.1%–0.5% 0.5%–3%+
Risk per Trade Very small Small to medium
Frequency High (10–50 trades/day) Moderate (2–10 trades/day)
Chart Timeframes Tick, 15s, 1m 1m, 5m, 15m
Market Conditions High liquidity, volatile Trending, news-driven
Mindset Ultra-fast decisions Patient within trend
4. Market Conditions Suitable for Each
Scalping Works Best When:
Market is choppy but liquid.
Bid-ask spread is tight.
Price moves in micro-waves.
There is high intraday volatility without a clear trend.
Momentum Works Best When:
Market has strong trend days.
There’s a news catalyst or earnings.
Breakouts/breakdowns occur with volume surge.
A sector rotation drives capital into specific stocks.
5. Technical Tools & Indicators
For Scalping
VWAP (Volume Weighted Average Price) – Used as a magnet for price action; scalpers fade moves away from VWAP or trade rejections.
EMA 9 & EMA 20 – For micro-trend direction.
Order Flow Analysis – Reading the tape to identify big orders.
Bollinger Bands (1-min) – Spotting overextensions.
Volume Profile – Identifying intraday support/resistance.
For Momentum
Moving Averages (EMA 20, EMA 50) – Identify trend continuation.
MACD – Confirm momentum strength.
RSI (5 or 14 period) – Spotting overbought/oversold within a trend.
Breakout Levels – Pre-marked resistance/support zones.
Relative Volume (RVOL) – Ensures trade is supported by unusual buying/selling pressure.
6. Strategies
6.1 Scalping Strategies
A) VWAP Bounce Scalping
Wait for price to pull back to VWAP after a quick move.
Enter on rejection candles.
Exit after a small bounce.
B) Breakout Scalping
Identify micro-breakouts from 1-min consolidation.
Enter just before the breakout.
Exit within seconds once target is hit.
C) Market Maker Following
Watch for large limit orders on Level 2.
Follow their buying/selling pressure.
Exit when big order disappears.
6.2 Momentum Strategies
A) News Catalyst Plays
Scan for stocks with fresh positive/negative news.
Wait for first pullback after breakout.
Ride until momentum slows.
B) Trend Continuation
Identify stock above VWAP and moving averages.
Enter on EMA 9/EMA 20 bounce.
Exit when price closes below EMA 20.
C) High Relative Volume Breakouts
Use RVOL > 2.0 filter.
Enter when volume spikes confirm breakout.
Place stop-loss just under breakout level.
7. Risk Management
Both scalping and momentum trading require tight stop-losses because small moves against you can quickly turn into bigger losses.
For Scalping:
Stop-loss: 0.1%–0.3%.
Risk per trade: ≤ 0.5% of account.
Don’t average down — cut losses immediately.
For Momentum:
Stop-loss: 0.5%–1.5%.
Risk per trade: ≤ 1% of account.
Trail stops to lock in profits.
General Rules:
Use position sizing: Risk Amount ÷ Stop Size = Position Size.
Always account for slippage.
Never risk more than you can afford to lose in a single day.
8. Trading Psychology
For Scalpers:
Stay hyper-focused. Avoid hesitation. The moment you second-guess, the trade is gone. Mental fatigue sets in quickly — take breaks.
For Momentum Traders:
Patience is key. Don’t exit too early from fear or greed. Stick to the plan and avoid chasing after missed moves.
Mind Traps to Avoid:
Overtrading.
Revenge trading after a loss.
Ignoring stop-loss because “it might bounce back.”
Letting small losses turn into big ones.
9. Examples of a Trading Day
Scalping Example
9:20 AM: Identify stock XYZ near pre-market resistance.
9:25 AM: Scalper enters on small pullback.
9:26 AM: Price moves 0.15% up — exit instantly.
Repeat 12–15 times, ending with 8 wins, 4 losses.
Momentum Example
9:25 AM: News drops on ABC Ltd.
9:30 AM: Stock gaps up 3%, breaks resistance with volume.
Buy at ₹252, hold for 20 minutes as it climbs to ₹259.
Exit when volume declines and price closes under EMA 20.
10. Common Mistakes
Scalping:
Entering in low-volume stocks → big slippage.
Over-leveraging.
Trading during low volatility periods.
Momentum:
Chasing moves without pullback.
Ignoring broader market trend.
Overstaying in trade after momentum fades.
11. Advanced Tips
Use hotkeys to speed up entries and exits.
Trade during high liquidity hours (first and last 90 minutes of market).
Combine pre-market analysis with real-time setups.
Keep a trading journal to refine entries/exits.
12. Conclusion
Intraday Scalping and Momentum Trading are high-performance trading styles that can generate consistent profits for skilled traders — but they’re not for the faint-hearted.
They require:
Quick decision-making.
Iron discipline.
Solid risk management.
Technical precision.
The golden rule is: protect your capital first, profits will follow.
Technical Indicators Mastery1. Introduction to Technical Indicators
In the world of financial trading, technical indicators are mathematical calculations based on historical price, volume, or open interest data. Traders use them to forecast future price movements, confirm trends, identify potential entry/exit points, and manage risk.
Technical indicators are not magic predictions—they are tools that help interpret market data and support informed decision-making. Their real value lies in:
Spotting trend direction (uptrend, downtrend, sideways)
Identifying momentum and overbought/oversold conditions
Measuring volatility for risk control
Detecting market volume shifts for confirmation
Timing entries and exits
There are hundreds of indicators, but most fall into five major categories:
Trend-following indicators (e.g., Moving Averages, MACD)
Momentum indicators (e.g., RSI, Stochastic)
Volatility indicators (e.g., Bollinger Bands, ATR)
Volume-based indicators (e.g., OBV, Volume Profile)
Market strength indicators (e.g., ADX, Aroon)
2. Understanding How Indicators Work
Every indicator is calculated using price data (open, high, low, close) and sometimes volume data. The formulas vary from simple averages to complex algorithms.
Example:
Simple Moving Average (SMA) = Sum of closing prices over n periods ÷ n
RSI = Measures the ratio of average gains to average losses over a period
They can be displayed:
Directly on the price chart (e.g., Moving Averages, Bollinger Bands)
In a separate indicator window below the chart (e.g., RSI, MACD histogram)
Key Rule: Indicators should be used in context—price action and market structure remain the foundation.
3. Trend-Following Indicators
Trend-following indicators help traders align with the market’s dominant direction rather than guessing tops and bottoms.
3.1 Moving Averages (MA)
SMA (Simple Moving Average): Smooths out price action for clearer trends.
EMA (Exponential Moving Average): Gives more weight to recent prices, reacts faster to changes.
Usage: Identify trend direction, dynamic support/resistance.
Example Strategy: Buy when price crosses above the 50 EMA, sell when it crosses below.
3.2 MACD (Moving Average Convergence Divergence)
Consists of MACD line, signal line, and histogram.
Signals:
MACD crossing above signal line = bullish
MACD crossing below signal line = bearish
Works well in trending markets but can give false signals in choppy conditions.
3.3 Parabolic SAR
Dots plotted above or below price.
Dots below price = uptrend, dots above price = downtrend.
Good for trailing stop-loss placement.
3.4 Supertrend
Combines ATR (volatility) and trend.
Turns green in bullish phase, red in bearish phase.
Often used in intraday trading for clarity.
4. Momentum Indicators
These measure the speed of price movement—helping traders catch the strongest trends and spot potential reversals.
4.1 RSI (Relative Strength Index)
Scale from 0 to 100.
Above 70 = overbought (possible reversal or pullback)
Below 30 = oversold (possible bounce)
Divergence between RSI and price can indicate trend exhaustion.
4.2 Stochastic Oscillator
Compares closing price to its price range over a set period.
%K and %D lines generate buy/sell signals via crossovers.
Effective in sideways markets for spotting turning points.
4.3 CCI (Commodity Channel Index)
Measures deviation from the average price.
Above +100 = strong bullish momentum.
Below -100 = strong bearish momentum.
4.4 Williams %R
Similar to Stochastic but inverted scale.
Ranges from 0 (overbought) to -100 (oversold).
5. Volatility Indicators
Volatility reflects market excitement or uncertainty. These indicators help with position sizing, stop placement, and detecting breakouts.
5.1 Bollinger Bands
Three lines: SMA (middle) and two bands at ± standard deviation.
Price hugging upper band = strong uptrend.
Bands squeezing together = low volatility (possible breakout).
5.2 ATR (Average True Range)
Measures average price range over a period.
Larger ATR = higher volatility.
Used to set stop-loss distances based on market conditions.
5.3 Keltner Channels
Similar to Bollinger Bands but use ATR for band width.
Better for trend-following strategies.
6. Volume-Based Indicators
Volume is the fuel of price movement—no fuel, no sustained move.
6.1 OBV (On-Balance Volume)
Cumulative volume measure that rises when price closes higher and falls when price closes lower.
Divergence from price can signal upcoming reversals.
6.2 Volume Profile
Shows volume traded at specific price levels, not time.
Helps identify high volume nodes (support/resistance) and low volume areas (potential breakout zones).
6.3 Chaikin Money Flow
Combines price and volume to measure buying/selling pressure.
7. Market Strength Indicators
These measure the underlying power of a trend.
7.1 ADX (Average Directional Index)
Scale from 0 to 100.
Above 25 = strong trend, below 20 = weak trend.
Doesn’t show direction—only strength.
7.2 Aroon Indicator
Aroon Up and Aroon Down measure time since highs/lows.
Crossovers indicate potential trend changes.
8. Combining Indicators for Better Accuracy
No single indicator is foolproof.
Traders often combine complementary indicators:
Trend + Momentum: 50 EMA + RSI
Trend + Volatility: MACD + Bollinger Bands
Volume + Price Action: Volume Profile + Price Structure
Golden Rule: Avoid indicator overload—stick to 2–3 well-chosen tools.
9. Common Mistakes with Indicators
Overfitting: Using too many indicators leading to analysis paralysis.
Lagging effect: Indicators often react after price has moved—accept this as part of trading.
Ignoring market context: Using RSI in strong trends can lead to false reversals.
No backtesting: Always test an indicator’s performance in your market/timeframe.
10. Practical Trading Strategies Using Indicators
10.1 Moving Average Crossover
Buy when 50 EMA crosses above 200 EMA (Golden Cross).
Sell when 50 EMA crosses below 200 EMA (Death Cross).
10.2 RSI Divergence
Price makes higher high, RSI makes lower high → bearish divergence.
Price makes lower low, RSI makes higher low → bullish divergence.
10.3 Bollinger Band Breakout
Wait for a squeeze → trade in direction of breakout.
Combine with volume for confirmation.
10.4 MACD Trend Following
Use MACD to ride trends, exit when histogram momentum fades.
Conclusion
Mastering technical indicators is about understanding their logic, selecting the right tools, and applying them with discipline.
Indicators don’t replace skill—they enhance it. The most successful traders combine:
Price action
Risk management
Market psychology
with carefully chosen indicators.
By practicing, backtesting, and refining, you turn indicators from mere lines on a chart into a precision decision-making toolkit.
Price Action Trading1. Introduction
Price Action Trading (PAT) is one of the most natural, clean, and powerful approaches to the financial markets.
It focuses on reading the movement of price itself rather than relying heavily on indicators or automated systems.
In other words — instead of asking, “What is my MACD or RSI saying?”, you ask, “What is the market actually doing right now?”
Price action traders believe that:
Price reflects all available market information.
Price moves in patterns due to human behavior, psychology, and market structure.
You can make trading decisions by analyzing candlesticks, chart patterns, and support/resistance.
2. The Core Philosophy
The philosophy behind price action is simple:
“Price is the ultimate truth of the market.”
Economic reports, earnings, interest rates, news — all these influence price. But you don’t need to predict them directly. Price action trading accepts that all such factors are already factored into the current price movement.
Instead of chasing the “why,” we focus on the “what”:
What is price doing? (trend, consolidation, reversal)
Where is price? (key levels, breakouts, ranges)
How is price moving? (speed, momentum, volatility)
3. Why Choose Price Action Trading?
Advantages:
Clarity: Charts are clean, no clutter from too many indicators.
Universal: Works on all markets — stocks, forex, crypto, commodities.
Timeless: Price patterns remain relevant because human psychology hasn’t changed for centuries.
Adaptability: Can be used for scalping, day trading, swing trading, or even position trading.
Early Entry Signals: Often gives quicker signals than lagging indicators.
Limitations:
Requires patience to master.
Interpretation can be subjective.
Demands strict discipline and emotional control.
4. Understanding Market Structure
Before you can trade with price action, you need to understand market structure.
Market structure is the basic “road map” of price movement.
4.1 Trends
Uptrend: Price forms higher highs (HH) and higher lows (HL).
Downtrend: Price forms lower highs (LH) and lower lows (LL).
Sideways / Range: Price moves between horizontal support and resistance.
4.2 Market Phases
Accumulation: Market moves sideways after a downtrend — buyers quietly building positions.
Markup: Strong upward movement with higher highs.
Distribution: Sideways after an uptrend — sellers offloading positions.
Markdown: Strong downward move.
5. Tools in Price Action Trading
While price action traders avoid heavy reliance on indicators, they do use certain tools to understand price movement better:
Candlestick Charts – Each candle shows open, high, low, close. Patterns reveal psychology.
Support & Resistance – Zones where price historically reacts.
Trendlines & Channels – Identify slope and direction of market.
Chart Patterns – Triangles, flags, head & shoulders, double tops/bottoms.
Volume (optional) – Confirms strength of moves.
Fibonacci Levels – Identify retracement and extension zones.
6. Candlestick Analysis
Candlestick patterns are the language of price action.
6.1 Single Candlestick Patterns
Pin Bar (Hammer / Shooting Star): Signals rejection of price at a level.
Doji: Market indecision — potential reversal or continuation.
Engulfing Candle: Strong shift in control between buyers and sellers.
6.2 Multi-Candlestick Patterns
Inside Bar: Consolidation before breakout.
Outside Bar: High volatility shift.
Morning/Evening Star: Strong reversal setups.
7. Support & Resistance (S/R)
These are the “battle zones” where buying or selling pressure builds.
Support: Price level where buyers outnumber sellers.
Resistance: Price level where sellers outnumber buyers.
Key Tip: Don’t think of them as thin lines — they’re zones.
8. Price Action Trading Strategies
Here’s where we get to the heart of the game — actionable setups.
8.1 Breakout Trading
Look for price breaking above resistance or below support with strong momentum.
Confirm with retests for higher probability.
8.2 Pullback Trading
Trade in the direction of the trend after a retracement.
Example: In uptrend, wait for price to pull back to support, then buy.
8.3 Pin Bar Reversal
Identify a long-tailed candle rejecting a level.
Trade in the opposite direction of the tail.
8.4 Inside Bar Breakout
Wait for an inside bar to form after strong movement.
Trade in the breakout direction.
8.5 Trendline Bounce
Draw trendlines connecting higher lows (uptrend) or lower highs (downtrend).
Trade bounces off the trendline.
9. Risk Management in Price Action Trading
Even the best setups fail — risk management keeps you in the game.
Stop Loss Placement:
Just beyond recent swing high/low.
Position Sizing:
Risk a fixed % of account (e.g., 1–2%).
Reward-to-Risk Ratio:
Minimum 2:1 for sustainability.
Avoid Overtrading:
Only trade A+ setups.
10. Trading Psychology & Price Action
Price action is as much about mindset as it is about technical skill.
Patience: Wait for the market to come to you.
Discipline: Follow your plan, not your emotions.
Adaptability: Market conditions change — so should you.
Confidence: Comes only from backtesting and experience.
11. Step-by-Step Price Action Trading Plan
Select Market & Timeframe
Example: Nifty futures on 15m chart for intraday.
Identify Market Structure
Uptrend? Downtrend? Range?
Mark Key S/R Levels
From higher timeframes first.
Wait for Setup
Pin bar, inside bar, breakout, pullback.
Confirm Entry
Momentum, volume (optional).
Place Stop Loss
Just beyond invalidation point.
Manage Trade
Partial profits, trailing stop.
Exit
Target hit or reversal signs.
12. Backtesting Price Action Strategies
Before going live:
Backtest at least 50–100 trades.
Note win rate, average R:R ratio, and drawdowns.
Refine entry & exit rules.
Conclusion
Price action trading strips the market down to its most fundamental truth: price movement itself.
By understanding market structure, candlestick patterns, and the psychology behind moves, you can trade with clarity and precision.
It takes time, patience, and discipline — but the payoff is the ability to read the market like a story.

Part 2 Support and ResistanceIntroduction to Options Trading
Options trading is one of the most flexible and powerful tools in the financial markets. Unlike stocks, where you simply buy and sell ownership of a company, options are derivative contracts that give you the right, but not the obligation, to buy or sell an underlying asset at a predetermined price within a specified time frame.
The beauty of options lies in their strategic possibilities — they allow traders to make money in rising, falling, or even sideways markets, often with less capital than buying stocks outright. But with that flexibility comes complexity, so understanding strategies is crucial.
Key Terms in Options Trading
Before we jump into strategies, let’s understand the key terms:
Call Option – Gives the right to buy the underlying asset at a fixed price (strike price) before expiry.
Put Option – Gives the right to sell the underlying asset at a fixed price before expiry.
Strike Price – The price at which you can buy/sell the asset.
Premium – The price you pay to buy an option.
Expiry Date – The date the option contract ends.
ITM (In-the-Money) – When exercising the option would be profitable.
ATM (At-the-Money) – Strike price is close to the current market price.
OTM (Out-of-the-Money) – Option has no intrinsic value yet.
Lot Size – Minimum number of shares/contracts per option

Support and ResistancePsychological Factors
Options trading is mentally challenging:
Overconfidence after a win can cause big losses.
Patience is key — many setups fail if entered too early.
Emotional control matters more than strategy.
Pro Tips for Successful Options Trading
Master 2-3 strategies before trying complex ones.
Use paper trading to practice.
Keep an eye on Option Chain data — OI buildup can hint at support/resistance.
Avoid holding long options to expiry unless sure — time decay will hurt.
Final Thoughts
Options trading is like a Swiss Army knife — powerful but dangerous if misused. With the right strategy, discipline, and risk management, traders can profit in any market condition. Whether you’re buying a simple call or building a complex Iron Condor, always remember: the market rewards preparation and patience.

Option Trading Practical Trading Examples
Let’s take a real-world India market scenario:
Event: Union Budget Day
High volatility expected.
Strategy: Buy Straddle (ATM CE + ATM PE).
Result: If NIFTY jumps or crashes by 300 points, profits can be significant.
Event: Stock Result Announcement (Infosys)
Medium move expected.
Strategy: Strangle (slightly OTM CE + OTM PE).
Result: Lower cost, profitable if stock moves big.
Risk Management in Options Trading
Options can wipe out capital quickly if used recklessly.
Follow these rules:
Never risk more than 2% of capital per trade.
Avoid over-leveraging — options give leverage, don’t overuse it.
Use stop-losses.
Avoid buying far OTM options unless speculating small amounts.
Track implied volatility — don’t overpay in high-IV environments.

Part 3 Learn Institutional TradingNon-Directional Strategies
Used when you expect low or high volatility but no clear trend.
Straddle
When to Use: Expecting big move either way.
Setup: Buy call + Buy put (same strike, same expiry).
Risk: High premium cost.
Reward: Large if price moves sharply.
Strangle
When to Use: Expect big move but want lower cost.
Setup: Buy OTM call + Buy OTM put.
Risk: Lower premium but needs bigger move to profit.
Iron Condor
When to Use: Expect sideways movement.
Setup: Sell OTM call + Buy higher OTM call, Sell OTM put + Buy lower OTM put.
Risk: Limited.
Reward: Premium income.

Part 8 Trading Master ClassProtective Put
When to Use: To insure against downside.
Setup: Own stock + Buy put option.
Risk: Premium paid.
Reward: Stock can rise, but downside is protected.
Example: Own TCS at ₹3,000, buy 2,900 PE for ₹50.
Bull Call Spread
When to Use: Expect moderate rise.
Setup: Buy lower strike call + Sell higher strike call.
Risk: Limited.
Reward: Limited.
Example: Buy 20,000 CE @ ₹100, Sell 20,200 CE @ ₹50.
Bear Put Spread
When to Use: Expect moderate fall.
Setup: Buy higher strike put + Sell lower strike put.
Risk: Limited.
Reward: Limited.

Part 1 Master Candlesticks PatternDirectional Strategies
These are for traders with a clear market view.
Long Call (Bullish)
When to Use: Expecting significant upward movement.
Setup: Buy a call option.
Risk: Limited to premium paid.
Reward: Unlimited.
Example: NIFTY at 20,000, you buy 20,100 CE for ₹100 premium. If NIFTY closes at 20,500, your profit = ₹400 - ₹100 = ₹300.
Long Put (Bearish)
When to Use: Expecting price drop.
Setup: Buy a put option.
Risk: Limited to premium.
Reward: Large if the asset falls.
Example: Stock at ₹500, buy 480 PE for ₹10. If stock drops to ₹450, profit = ₹30 - ₹10 = ₹20.
Covered Call (Mildly Bullish)
When to Use: Own the stock but expect limited upside.
Setup: Hold stock + Sell call option.
Risk: Stock downside risk.
Reward: Premium income + stock gains until strike price.
Example: Own Reliance at ₹2,500, sell 2,600 CE for ₹20 premium.

Part 2 Master Candlesticks PatternHow Options Work in Trading
Imagine a stock is trading at ₹1,000.
You believe it will rise to ₹1,100 in a month. You could:
Buy the stock: You need ₹1,000 per share.
Buy a call option: You pay a small premium (say ₹50) for the right to buy at ₹1,000 later.
If the stock rises to ₹1,100:
Stock profit = ₹100
Call option profit = ₹100 (intrinsic value) - ₹50 (premium) = ₹50 net profit (but with much lower capital).
This leverage makes options attractive but also risky — if the stock doesn’t rise, your premium is lost.
Categories of Options Strategies
Options strategies can be divided into three main categories:
Directional Strategies – Profit from price movements.
Non-Directional (Neutral) Strategies – Profit from sideways markets.
Hedging Strategies – Protect existing positions.

Part 9 Trading Master ClassIntroduction to Options Trading
Options trading is one of the most flexible and powerful tools in the financial markets. Unlike stocks, where you simply buy and sell ownership of a company, options are derivative contracts that give you the right, but not the obligation, to buy or sell an underlying asset at a predetermined price within a specified time frame.
The beauty of options lies in their strategic possibilities — they allow traders to make money in rising, falling, or even sideways markets, often with less capital than buying stocks outright. But with that flexibility comes complexity, so understanding strategies is crucial.
Key Terms in Options Trading
Before we jump into strategies, let’s understand the key terms:
Call Option – Gives the right to buy the underlying asset at a fixed price (strike price) before expiry.
Put Option – Gives the right to sell the underlying asset at a fixed price before expiry.
Strike Price – The price at which you can buy/sell the asset.
Premium – The price you pay to buy an option.
Expiry Date – The date the option contract ends.
ITM (In-the-Money) – When exercising the option would be profitable.
ATM (At-the-Money) – Strike price is close to the current market price.
OTM (Out-of-the-Money) – Option has no intrinsic value yet.
Lot Size – Minimum number of shares/contracts per option.
Intrinsic Value – The real value if exercised now.
Time Value – Extra premium based on time left to expiry.

Crypto Trading Strategies1. Introduction
Cryptocurrency trading has evolved from a niche hobby into a multi-trillion-dollar global market. Since the launch of Bitcoin in 2009, digital assets have grown in variety, market capitalization, and adoption. Today, traders have access to thousands of cryptocurrencies — from large-cap giants like Bitcoin (BTC) and Ethereum (ETH) to small-cap altcoins and DeFi tokens.
However, trading crypto is not just about buying low and selling high. It's about mastering strategies that suit the market's unique volatility, liquidity, and round-the-clock nature.
In this guide, we will explore different crypto trading strategies, breaking them down into short-term, medium-term, and long-term approaches. We’ll cover technical, fundamental, and sentiment analysis, along with tools, indicators, and risk management.
2. Characteristics of the Crypto Market
Before diving into strategies, it's essential to understand what makes the crypto market different from traditional markets:
24/7 Trading:
Unlike stock markets, cryptocurrencies trade all day, every day, without holidays.
High Volatility:
Price swings of 5–20% in a day are common, offering opportunities — and risks.
Decentralized Nature:
No single authority controls the market, which reduces regulatory safeguards but increases freedom.
Liquidity Variance:
Large-cap coins like BTC have high liquidity, while smaller altcoins can be illiquid and more volatile.
Market Sentiment Driven:
News, tweets, and community hype can significantly impact price movements.
3. Types of Crypto Trading Strategies
We can broadly classify strategies into short-term, medium-term, and long-term.
A. Short-Term Crypto Trading Strategies
These strategies aim to profit from quick price fluctuations over minutes, hours, or a few days.
1. Scalping
Definition:
Scalping involves making dozens or even hundreds of trades per day to profit from small price changes.
How It Works:
Traders look for tiny price gaps in order book spreads or reaction to short-term momentum.
Positions are often held for seconds to minutes.
Tools & Indicators:
1-minute to 5-minute charts
Moving Averages (MA)
Bollinger Bands
Order book depth
Advantages:
Frequent trading opportunities.
Lower exposure to overnight risks.
Disadvantages:
High transaction fees can eat profits.
Requires quick decision-making and focus.
2. Day Trading
Definition:
Opening and closing trades within the same day to avoid overnight market exposure.
How It Works:
Identify intraday trends using technical analysis.
Close positions before daily candle ends.
Key Indicators:
Relative Strength Index (RSI)
Moving Average Convergence Divergence (MACD)
Volume analysis
Example:
If Bitcoin breaks a resistance level at $65,000 with strong volume, a day trader might buy, targeting $66,500 with a stop loss at $64,700.
3. Momentum Trading
Definition:
Trading based on the strength of current market trends.
How It Works:
Enter trades when momentum indicators signal strong buying or selling pressure.
Ride the trend until signs of reversal appear.
Indicators:
RSI above 70 (overbought) or below 30 (oversold)
MACD crossovers
Trendlines
4. Arbitrage
Definition:
Profiting from price differences of the same asset across different exchanges.
Example:
If BTC is trading at $65,000 on Binance and $65,300 on Kraken, a trader buys on Binance and sells on Kraken for a quick profit.
Types of Arbitrage:
Cross-exchange arbitrage
Triangular arbitrage (between three pairs)
Challenges:
Execution speed
Transaction fees and withdrawal times
B. Medium-Term Crypto Trading Strategies
These involve holding positions from days to weeks.
5. Swing Trading
Definition:
Capturing medium-term trends or price “swings” within a larger trend.
How It Works:
Analyze 4-hour to daily charts.
Enter during pullbacks in an uptrend or rallies in a downtrend.
Indicators:
Fibonacci retracement levels
Moving averages
Trendlines
Example:
If Ethereum rises from $2,000 to $2,500, pulls back to $2,300, and resumes upward momentum, a swing trader might buy targeting $2,700.
6. Breakout Trading
Definition:
Entering trades when price breaks through a defined support or resistance level.
How It Works:
Identify key chart levels.
Trade the breakout with confirmation from volume.
Indicators:
Bollinger Band squeeze
Volume spikes
Price action
7. Range Trading
Definition:
Buying at support and selling at resistance in sideways markets.
Example:
If Cardano (ADA) trades between $0.90 and $1.10 for weeks, a range trader buys near $0.90 and sells near $1.10 repeatedly.
C. Long-Term Crypto Trading Strategies
These strategies involve holding positions for months or years.
8. HODLing
Definition:
A misspelling of "hold" that became a crypto meme — essentially buy and hold.
How It Works:
Invest in fundamentally strong projects.
Ignore short-term volatility.
Example:
Buying Bitcoin at $3,000 in 2018 and holding until $60,000 in 2021.
9. Value Investing in Crypto
Definition:
Identifying undervalued coins based on fundamentals like technology, adoption, and tokenomics.
Factors to Consider:
Whitepaper quality
Developer activity
Community engagement
Real-world use cases
10. Staking & Yield Farming
Definition:
Earning passive income by locking coins in proof-of-stake networks or DeFi protocols.
Advantages:
Steady returns
Increases total holdings
Risks:
Smart contract bugs
Impermanent loss in liquidity pools
4. Technical Analysis in Crypto Strategies
Most crypto strategies rely on technical analysis (TA). Key TA concepts:
Trend Identification
Uptrend: Higher highs, higher lows
Downtrend: Lower highs, lower lows
Support & Resistance
Psychological levels like round numbers often act as barriers.
Indicators
RSI
MACD
Moving Averages
Bollinger Bands
Volume Profile
Candlestick Patterns
Doji, engulfing, hammer patterns
5. Fundamental Analysis in Crypto
FA in crypto focuses on project fundamentals:
Whitepaper analysis
Tokenomics (supply, burn rate)
Team credibility
Roadmap progress
Partnerships and adoption
6. Sentiment Analysis
Crypto markets are heavily sentiment-driven.
Tools like LunarCrush, Santiment, and Twitter activity tracking can gauge market mood.
7. Risk Management in Crypto Trading
Never invest more than you can afford to lose.
Use stop losses.
Limit leverage (especially in volatile markets).
Diversify portfolio.
8. Common Mistakes to Avoid
Overtrading
Ignoring stop-loss rules
FOMO (Fear of Missing Out) buying
Lack of research
Excessive leverage
9. Tools for Crypto Trading
Exchanges: Binance, Coinbase, Kraken
Charting: TradingView
Portfolio Tracking: CoinMarketCap, CoinGecko
Automation: 3Commas, Pionex
10. Final Thoughts
Crypto trading can be extremely rewarding but also risky due to unpredictable volatility. A successful trader understands the market’s behavior, uses clear strategies, and follows strict risk management.
The choice between scalping, swing trading, or HODLing depends on your time availability, risk tolerance, and skill level.

Building a Consistent Trading PlanIntroduction
Trading without a plan is like sailing without a compass — you may catch some winds, but without direction, you’ll eventually drift into trouble. A consistent trading plan is the blueprint that guides your decision-making, helps control your emotions, and allows you to measure performance objectively. It’s the difference between gambling and structured, calculated trading.
In this guide, we’ll explore how to build a complete trading plan from scratch, the core components every trader must include, the psychological discipline needed, and real-world implementation steps to maintain consistency.
1. Why a Trading Plan Matters
Before we start building, let’s understand the why.
Removes Emotional Decision-Making
Without a plan, traders tend to react impulsively to market moves, buying out of greed or selling out of fear. A trading plan gives a predefined set of rules, reducing emotional bias.
Creates Measurable Consistency
Consistency is key in trading. A trading plan ensures that every trade is based on the same logic, making it easier to identify strengths and weaknesses in your approach.
Improves Risk Management
It forces you to define how much you’re willing to lose per trade and per day/week/month, helping to protect your capital.
Enables Continuous Improvement
When you follow a documented plan, you can review your trades, find patterns in mistakes, and improve over time.
2. Foundations of a Trading Plan
A good trading plan rests on four pillars:
Clear goals – Defining what you want to achieve and in what timeframe.
Trading strategy – How you find, enter, and exit trades.
Risk management – Protecting capital and managing exposure.
Psychological discipline – Staying consistent under stress.
Step 1: Define Your Trading Goals
Your goals need to be Specific, Measurable, Achievable, Relevant, and Time-bound (SMART).
Example:
Earn 3% per month on average.
Limit monthly drawdown to 5%.
Execute no more than 20 trades per month.
Review performance weekly.
Long-term vs. Short-term goals:
Short-term: Develop discipline, avoid overtrading, stick to stop-loss rules.
Long-term: Build a track record, scale position sizes, move toward full-time trading.
Step 2: Choose Your Trading Style
Different trading styles require different plans. Choose the one that matches your time availability, personality, and capital.
Trading Style Holding Time Time Commitment Risk Profile Example Assets
Scalping Seconds–Minutes High High Forex, Index Futures
Day Trading Minutes–Hours High High Stocks, Commodities
Swing Trading Days–Weeks Medium Medium Equities, ETFs
Position Trading Weeks–Months Low Low Stocks, Bonds
Step 3: Select Your Market & Instruments
A trading plan should specify exactly what markets you trade to avoid distraction.
Example:
Markets: Nifty50, Bank Nifty, Gold, EUR/USD
Instruments: Futures, Options, Spot Market
Avoid spreading yourself too thin — mastering one market is more profitable than dabbling in many.
3. Core Components of a Trading Plan
Let’s break down exactly what to include in your plan.
A. Entry Criteria
Clearly define the conditions that must be met before you enter a trade.
Example (Technical-based Entry):
Price must be above the 50 EMA for long trades.
Entry trigger: Breakout of last swing high with above-average volume.
Confirmation: RSI above 50 but below overbought.
Example (Fundamental-based Entry):
Quarterly earnings growth > 20%.
Stock in strong sector outperforming the market.
Institutional buying trend confirmed.
Tip: Avoid vague signals like “when I feel it’s right” — your rules should be objective and back-testable.
B. Exit Criteria
Exits are more important than entries for profitability.
Two types of exits:
Stop Loss Exit – A predefined loss limit per trade.
Target Profit Exit – A predefined profit goal, or trailing stop for trend-following.
Example:
Stop Loss: 1.5% below entry.
Target: 3% above entry (2:1 reward-to-risk ratio).
Trailing Stop: Move stop to breakeven after 1% gain.
C. Risk Management Rules
Without risk control, even the best strategy will fail.
Key Rules:
Risk per trade: 1–2% of capital.
Max daily loss: 4% of capital.
Max open positions: 3 at a time.
Position sizing formula:
Position Size = (Account Size × Risk %) / Stop Loss (in price terms)
Example:
Account Size = ₹5,00,000
Risk per trade = 1% = ₹5,000
Stop loss distance = ₹10
Position size = 500 shares.
D. Money Management
Money management focuses on how profits are reinvested and how losses are recovered.
Approaches:
Fixed Fractional: Risk a fixed percentage of current equity.
Kelly Criterion: Optimize bet size based on historical win rate and payoff ratio.
Scaling In/Out: Increase size in winning trades, reduce exposure in losing trades.
E. Trade Management
Trade management deals with what you do after entering a trade.
Do you let profits run or take partial profits?
Do you move your stop loss after a certain gain?
Do you hedge positions?
A strong trading plan has exact decision points for trade management.
F. Trading Journal
A trading journal is non-negotiable. It records:
Date & time
Market & instrument
Entry & exit price
Stop loss & target
Trade rationale
Result (profit/loss)
Emotional state
Why it’s important: Reviewing past trades exposes patterns of mistakes and successes.
4. Psychological Discipline in Trading
A trading plan is useless if you don’t follow it.
Key Mental Challenges:
Fear of Missing Out (FOMO) – Chasing moves without confirmation.
Revenge Trading – Trying to recover losses quickly.
Overtrading – Taking too many trades without quality setups.
Loss Aversion – Cutting winners too early and letting losers run.
Solutions:
Pre-market checklist.
Daily routine.
Accountability partner or trading community.
Meditation or breathing exercises to reset focus.
5. Backtesting and Forward Testing
Before trading live, your plan must be tested.
Backtesting:
Test your strategy on at least 1–2 years of historical data.
Track win rate, average profit/loss, drawdowns.
Forward Testing (Paper Trading):
Execute trades in a simulated account.
Evaluate performance under current market conditions.
6. Building Your Trading Routine
Consistency comes from habits.
Pre-Market Routine:
Review overnight news.
Identify key support/resistance levels.
Prepare watchlist.
Plan possible entry/exit levels.
During Market Hours:
Follow plan strictly.
Avoid unplanned trades.
Post-Market Routine:
Review trades.
Update journal.
Analyze mistakes.
7. Continuous Improvement
The market evolves — so should your plan.
Monthly Review Checklist:
What rules did I break?
Which setups worked best?
Is my win rate improving?
Is my risk/reward ratio holding?
Quarterly Updates:
Adjust stop loss levels.
Modify position sizing.
Test new indicators or filters.
8. Common Mistakes to Avoid
Trading multiple strategies without mastery.
Ignoring risk rules after a streak of wins.
Changing strategies too often.
Not accounting for transaction costs and slippage.
9. Example of a Simple Trading Plan
Trading Style: Swing Trading
Market: Nifty50 stocks
Strategy: 50 EMA trend-follow with RSI confirmation
Entry Rules:
Price above 50 EMA.
RSI between 50–70.
Breakout of last 10-day high with volume spike.
Exit Rules:
Stop Loss: 2% below entry.
Target: 4% above entry or trailing stop.
Risk Management:
Risk per trade: 1% of account.
Max open positions: 4.
Routine:
Pre-market: Scan for setups.
Post-market: Journal trades, review performance.
Conclusion
A consistent trading plan is not a guarantee of profits — but it guarantees discipline, risk control, and structured decision-making, which are the foundations for profitability. The best traders are not those who predict the market perfectly, but those who manage their trades systematically over years.
Your plan should be written down, tested, followed, and reviewed regularly. The market will keep changing, but your disciplined approach will keep you in the game.
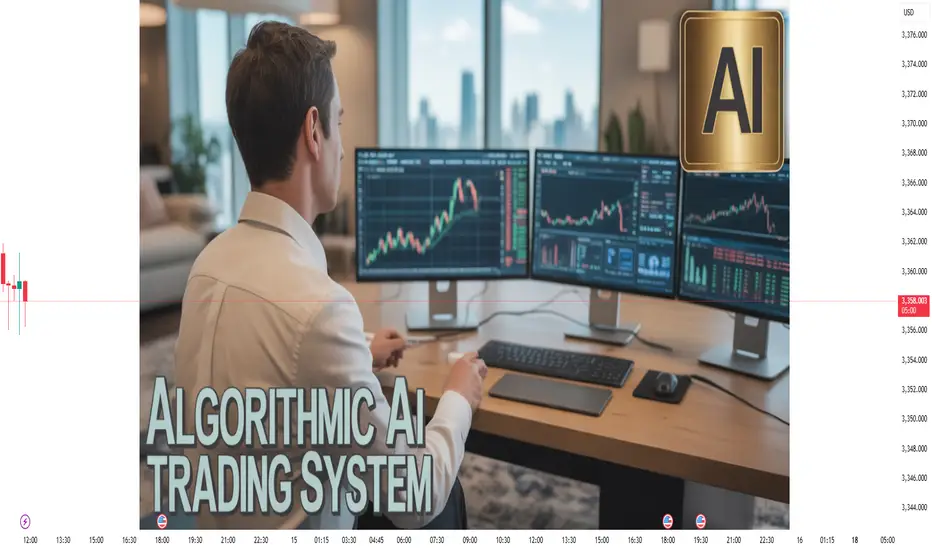
Algorithmic & AI-Powered Trading1. Introduction: The Shift from Manual to Machine
For centuries, trading was purely a human skill — traders watched ticker tapes, read news, and relied on gut instinct. But as markets grew faster and more complex, human reaction time simply couldn’t keep up.
Enter algorithmic trading — a world where trades are executed in milliseconds, strategies are tested on decades of data, and human bias takes a back seat.
Over the past decade, Artificial Intelligence (AI) has supercharged this process.
Now, trading systems not only follow pre-set rules but also learn from market data, adapt strategies in real time, and detect patterns invisible to human eyes.
In 2025, over 70% of all equity trades in developed markets are algorithmic. In some markets, AI-powered systems handle more trading volume than humans.
2. What is Algorithmic Trading?
At its core, algorithmic trading is:
The use of computer programs to execute trades based on a defined set of rules and parameters.
Key features:
Rule-based execution: Trades are placed when certain conditions are met (e.g., price crosses moving average).
Speed & automation: No waiting for human clicks; execution is near-instant.
Backtesting: Strategies can be tested on historical data before risking real money.
Scalability: Can handle hundreds of trades simultaneously.
Example:
If a stock’s 50-day moving average crosses above its 200-day moving average, buy 100 shares. If the reverse happens, sell.
3. What is AI-Powered Trading?
AI-powered trading takes algorithms further:
Instead of pre-programmed rules, AI systems can learn patterns, adapt strategies, and make predictions based on data.
Core difference:
Algorithmic trading = fixed rules.
AI trading = adaptive, self-learning rules.
AI capabilities in trading:
Pattern recognition – spotting trends in price, volume, sentiment, or macro data.
Predictive modeling – forecasting future price movements.
Reinforcement learning – improving strategies based on feedback from trades.
Natural Language Processing (NLP) – reading and interpreting news, social media, and financial reports.
4. Types of Algorithmic & AI Trading Strategies
There’s a wide range of strategies — some decades old, others made possible only by modern AI.
A. Trend-Following Strategies
Based on technical indicators like Moving Averages, RSI, MACD.
Goal: Ride the trend up or down until it shows signs of reversal.
AI twist: Deep learning models can predict trend continuation probability.
B. Mean Reversion Strategies
Assumes prices will revert to an average over time.
Example: If a stock is far above its 20-day moving average, short it; if far below, buy.
AI twist: Machine learning models detect the optimal mean reversion window dynamically.
C. Arbitrage Strategies
Exploiting price differences between markets or instruments.
Example: If a stock trades at ₹100 in NSE and ₹101 in BSE, buy low, sell high instantly.
AI twist: AI can scan thousands of instruments and markets for fleeting arbitrage opportunities.
D. Statistical Arbitrage
Uses correlations between assets (pairs trading).
Example: If Reliance and ONGC usually move together, but Reliance rallies while ONGC lags, trade expecting convergence.
AI twist: AI can detect shifting correlations and adapt.
E. High-Frequency Trading (HFT)
Ultra-fast trades exploiting tiny inefficiencies.
Requires low-latency infrastructure.
AI twist: AI can dynamically adjust order placement to reduce slippage.
F. Sentiment Analysis Trading
Uses NLP to gauge market sentiment from news, tweets, blogs.
Example: AI detects a surge in positive sentiment toward Tesla, triggering a buy.
AI twist: Transformer-based NLP models (like GPT) can analyze sarcasm, tone, and context better than older keyword-based systems.
G. Market Making
Posting buy and sell orders to earn the bid-ask spread.
Requires continuous price adjustment.
AI twist: Reinforcement learning optimizes spread width for profitability.
5. Key Components of an Algorithmic/AI Trading System
Building a profitable system is more than just coding a strategy. It needs an ecosystem:
Market Data Feed
Real-time & historical prices, volumes, order book data.
AI needs clean, high-quality data to avoid bias.
Signal Generation
Algorithm or AI model generates buy/sell/hold signals.
Could be purely quantitative or include sentiment and fundamentals.
Execution Engine
Sends orders to the exchange with minimal delay.
AI can optimize execution to avoid market impact.
Risk Management Module
Position sizing, stop-loss levels, portfolio diversification.
AI can dynamically adjust risk based on volatility.
Backtesting Framework
Tests strategy on historical data.
Important: Avoid overfitting — making the model too perfect for past data but useless in the future.
Monitoring & Maintenance
Even AI needs human oversight.
Models can degrade if market behavior shifts (concept drift).
6. Role of Machine Learning in Trading
Machine Learning (ML) is the backbone of AI-powered trading.
Popular ML techniques in trading:
Supervised Learning – Train on historical prices to predict next-day returns.
Unsupervised Learning – Cluster stocks with similar price behavior.
Reinforcement Learning – Learn by trial and error in simulated markets.
Deep Learning – Use neural networks to detect complex patterns in large datasets.
Example:
A neural network could take in:
Price data
Volume data
News sentiment
Macroeconomic indicators
…and output a probability of the stock rising in the next 5 minutes.
7. Advantages of Algorithmic & AI Trading
Speed – Executes in milliseconds.
Accuracy – No fat-finger trade errors.
No emotional bias – Sticks to the plan.
Scalability – Monitors hundreds of assets.
24/7 markets – Especially useful in crypto trading.
Pattern discovery – Finds relationships humans might miss.
8. Risks & Challenges
Not everything is a profit paradise.
A. Technical Risks
System crashes
Internet outages
Latency issues
B. Model Risks
Overfitting to historical data
Concept drift (market behavior changes)
C. Market Risks
Sudden news events (e.g., black swan events)
Flash crashes caused by runaway algorithms
D. Regulatory Risks
Exchanges and regulators monitor algo trading to prevent manipulation.
Some AI strategies might accidentally trigger market manipulation patterns.
9. Risk Management in AI Trading
A robust system must:
Use position sizing (risk only 1-2% of capital per trade).
Place stop-loss & take-profit levels.
Have circuit breakers to halt trading if unusual volatility occurs.
Validate models regularly against out-of-sample data.
10. Backtesting & Optimization
Before deploying:
Data cleaning – Remove bad ticks, adjust for splits/dividends.
Out-of-sample testing – Use unseen data to test robustness.
Walk-forward testing – Periodically re-train and test.
Monte Carlo simulations – Stress-test strategies under random conditions.
11. Real-World Applications
Hedge Funds: Renaissance Technologies, Two Sigma.
Banks: JPMorgan’s LOXM AI execution algorithm.
Retail: Zerodha Streak, AlgoTrader.
Crypto: AI bots analyzing blockchain transactions.
12. Future Trends in AI Trading
Explainable AI – Making AI’s decision-making transparent.
Hybrid human-AI teams – AI generates signals; humans validate.
Quantum computing – Potentially breaking speed and complexity barriers.
Multi-agent reinforcement learning – AI “traders” competing/cooperating in simulations.
13. Conclusion
Algorithmic & AI-powered trading is no longer just a Wall Street tool — it’s accessible to retail traders, thanks to low-cost cloud computing, APIs, and open-source machine learning libraries.
The key to success isn’t just having an algorithm — it’s about data quality, model robustness, disciplined risk management, and constant adaptation.
Smart Money Concepts (SMC) & Liquidity Trading1. Introduction
In financial markets, price does not move randomly — it’s influenced by the decisions of big players often called Smart Money. These players include institutional investors, hedge funds, prop firms, and high-frequency trading algorithms. Unlike retail traders, they have vast capital, deep research capabilities, and the ability to move markets.
Smart Money Concepts (SMC) is a modern trading framework that focuses on understanding how these institutions operate — where they enter, where they exit, and how they trap retail traders.
A related idea is Liquidity Trading, which explains how Smart Money hunts for liquidity — areas in the market where many buy/sell orders are clustered. The price often moves to these zones before reversing.
In short:
Retail traders follow indicators and news.
Smart Money follows liquidity and order flow.
2. The Core Principles of Smart Money Concepts
SMC revolves around understanding the footprints left by institutional traders.
2.1 Market Structure
Market structure refers to how price moves in swings — forming highs and lows.
Bullish Structure: Higher Highs (HH) & Higher Lows (HL)
Bearish Structure: Lower Highs (LH) & Lower Lows (LL)
Structure Break (BOS): When price violates the previous high/low — signaling a potential trend change.
Change of Character (CHOCH): Early sign of trend reversal when price breaks the first structural level in the opposite direction.
📌 Why it matters in SMC:
Smart Money often shifts from accumulation to distribution phases through structure breaks. If you can read structure, you can anticipate reversals.
2.2 Order Blocks
An Order Block is the last bullish or bearish candle before a strong price move in the opposite direction, usually caused by institutional order placement.
Bullish Order Block (B-OB): Last down candle before price surges upward.
Bearish Order Block (B-OB): Last up candle before price drops.
📌 Why it matters:
Institutions leave these “footprints” because their large orders cannot be filled instantly. Price often revisits these zones to fill unexecuted orders before moving further.
2.3 Liquidity Pools
Liquidity pools are areas where many stop-losses or pending orders are gathered.
Buy-Side Liquidity (BSL): Above swing highs where buy stop orders and short stop-losses sit.
Sell-Side Liquidity (SSL): Below swing lows where sell stop orders and long stop-losses sit.
📌 Why it matters:
Smart Money drives price into these pools to trigger stop orders and gain enough liquidity to enter or exit large positions.
2.4 Fair Value Gaps (FVG) / Imbalances
A Fair Value Gap is a price imbalance caused when market moves rapidly, leaving a gap in the price structure (often between candle wicks).
📌 Why it matters:
Price often returns to fill these gaps before continuing the main trend, as Smart Money prefers balanced price action.
2.5 The “Smart Money Cycle”
The market typically moves in this cycle:
Accumulation – Institutions quietly build positions at key zones.
Manipulation (Liquidity Grab) – Price fakes out retail traders by hitting stop losses or false breakouts.
Distribution (Mark-up/Mark-down) – The true move begins as Smart Money pushes price strongly in the intended direction.
3. Liquidity Trading in Detail
Liquidity trading focuses on identifying where liquidity is and predicting how price will move to capture it.
3.1 Why Liquidity Matters
Large orders cannot be executed without enough liquidity. Institutions need retail traders' orders to fill their positions.
Example:
If a hedge fund wants to go long, they need sellers to provide liquidity.
They might push the price down first, triggering stop-losses of buyers, to gather those sell orders before pushing price up.
3.2 Types of Liquidity
Resting Liquidity:
Stop-losses above/below swing highs/lows.
Pending limit orders at support/resistance.
Dynamic Liquidity:
Orders entering the market as price moves (market orders).
Session Liquidity:
High liquidity periods like London Open, New York Open.
3.3 Liquidity Grab (Stop Hunt)
A liquidity grab is when price briefly moves past a key level to trigger orders before reversing.
Example:
Retail sees resistance at 1.2000 in EUR/USD.
Price spikes to 1.2005 (triggering breakout buys and stop-losses of shorts).
Immediately reverses to 1.1950.
4. Combining SMC & Liquidity Trading
The real power comes when you merge SMC concepts with liquidity zones.
4.1 Step-by-Step Process
Identify Market Structure – Are we in bullish or bearish territory?
Mark Liquidity Zones – Where are the obvious highs/lows where orders cluster?
Spot Order Blocks – Look for institutional footprints.
Watch for Liquidity Grabs – Did price sweep a high/low?
Enter on Confirmation – Use BOS, CHOCH, or FVG fills for precise entries.
Manage Risk – Stop-loss just beyond liquidity sweep zones.
4.2 Example Trade
Context: Bullish trend on daily chart.
Liquidity Zone: Sell-side liquidity just below recent swing low.
Event: Price dips below swing low during London session (stop hunt), then aggressively pushes upward.
Entry: After BOS on 15-min chart.
Stop-loss: Below liquidity sweep low.
Target: Next buy-side liquidity pool above.
5. The Psychology Behind SMC
Institutions know retail traders:
Use obvious support/resistance.
Place stop-losses just beyond these zones.
Chase breakouts without confirmation.
Smart Money uses this predictability to engineer liquidity events — moving price to trap one side before reversing.
📌 Key Insight:
Price doesn’t move because of “magic” — it moves because Smart Money needs liquidity to execute orders.
6. Common Mistakes Traders Make
Blindly Trading Order Blocks – Not all OBs are valid; context is crucial.
Ignoring Higher Timeframes – A valid OB on 5-min might be irrelevant in daily structure.
Confusing BOS with CHOCH – Leads to premature entries.
Not Waiting for Confirmation – Jumping in before liquidity is grabbed.
Overloading Indicators – SMC works best with a clean chart.
7. Advanced SMC & Liquidity Concepts
7.1 Mitigation Blocks
When price returns to an order block but doesn’t fully reverse — instead, it continues trend after partially “mitigating” the zone.
7.2 Internal & External Liquidity
External Liquidity: Major swing highs/lows visible to everyone.
Internal Liquidity: Smaller highs/lows inside larger moves.
Smart Money often sweeps internal liquidity first, then external liquidity.
7.3 Time & Price Theory
Certain times of day (e.g., London open) align with higher probability liquidity sweeps due to volume influx.
8. Practical Trading Plan Using SMC & Liquidity
8.1 Daily Preparation
Higher Timeframe Bias:
Identify daily & 4H market structure.
Mark Key Zones:
Liquidity pools, order blocks, FVGs.
Session Plan:
Anticipate liquidity grabs during London/NY opens.
8.2 Execution Rules
Wait for liquidity sweep.
Confirm with BOS or CHOCH.
Enter with minimal risk, aiming for 1:3+ R:R.
Exit at next liquidity pool.
8.3 Risk Management
Risk 1% per trade.
Stop-loss beyond liquidity grab.
Use partial profit-taking at mid-targets.
9. Why SMC Outperforms Traditional Strategies
Focuses on why price moves, not just what price does.
Aligns trading with the biggest players in the market.
Avoids fakeouts by understanding liquidity grabs.
10. Final Thoughts
Smart Money Concepts & Liquidity Trading are not “magic tricks.”
They’re a lens to view the market’s true mechanics — the interplay of institutional demand and retail supply.
When mastered:
You stop fearing stop hunts — you anticipate them.
You stop guessing — you read the market’s intent.
You trade with the big players, not against them.
Part 12 Trading Master ClassCommon Mistakes to Avoid
Holding OTM options too close to expiry hoping for a miracle.
Selling naked calls without understanding unlimited risk.
Over-leveraging with too many contracts.
Ignoring commissions and slippage.
Not adjusting positions when market changes.
Practical Tips for Success
Backtest strategies on historical data.
Start with paper trading before using real money.
Track your trades in a journal.
Combine technical analysis with options knowledge.
Trade liquid options with tight bid-ask spreads.

Part 3 Institutional TradingRisk Management in Options
Even though options can limit loss, traders often misuse them and blow accounts.
Key risk tips:
Never risk more than 2–3% of capital on one trade.
Understand implied volatility — high IV inflates premiums.
Avoid selling naked options without sufficient margin.
Always set stop-loss rules.
Understanding Greeks (The DNA of Options Pricing)
Delta – How much the option price changes per ₹1 move in stock.
Gamma – How fast delta changes.
Theta – Time decay rate.
Vega – Sensitivity to volatility changes.
Rho – Interest rate sensitivity.
Mastering the Greeks means you understand why your option is moving, not just that it’s moving.

Part 2 Ride The Big MovesAdvanced Options Strategies
Butterfly Spread
When to Use: Expect stock to stay near a specific price.
How It Works: Buy 1 ITM option, sell 2 ATM options, buy 1 OTM option.
Risk: Limited.
Reward: Highest if stock ends at middle strike.
Example: Stock ₹100, buy call ₹95, sell 2 calls ₹100, buy call ₹105.
Calendar Spread
When to Use: Expect low short-term volatility but possible long-term move.
How It Works: Sell short-term option, buy long-term option at same strike.
Risk: Limited to net premium.
Reward: Comes from time decay of short option.
Ratio Spread
When to Use: Expect limited move in one direction.
How It Works: Buy 1 option, sell multiple options at different strikes.
Risk: Unlimited on one side if not hedged.
Diagonal Spread
When to Use: Expect gradual move over time.
How It Works: Buy long-term option at one strike, sell short-term option at different strike.

Part4 Institutional TradingWhy Traders Use Options
Options aren’t just for speculation — they have multiple uses:
Speculation – Betting on price moves.
Hedging – Protecting an existing investment from loss.
Income Generation – Selling options for premium income.
Risk Management – Limiting losses through defined-risk trades.
Basic Options Strategies (Beginner Level)
Buying Calls
When to Use: You expect the price to go up.
How It Works: You buy a call option to lock in a lower purchase price.
Risk: Limited to the premium paid.
Reward: Unlimited upside.
Example: Stock at ₹100, buy a call at ₹105 strike for ₹3 premium. If stock rises to ₹120, your profit = ₹12 – ₹3 = ₹9 per share.
Buying Puts
When to Use: You expect the price to go down.
How It Works: You buy a put option to sell at a higher price later.
Risk: Limited to the premium.
Reward: Significant (but capped at the strike price minus premium).
Example: Stock at ₹100, buy a put at ₹95 for ₹2 premium. If stock drops to ₹80, profit = ₹15 – ₹2 = ₹13.

Part6 Institutional TradingIntroduction to Options Trading
Options are like a financial “contract” that gives you rights but not obligations.
When you buy an option, you are buying the right to buy or sell an asset at a specific price before a certain date.
They’re mainly used in stocks, commodities, indexes, and currencies.
Two main types of options:
Call Option – Right to buy an asset at a set price.
Put Option – Right to sell an asset at a set price.
Key terms:
Strike Price – The price at which you can buy/sell the asset.
Expiration Date – The last day you can use the option.
Premium – Price paid to buy the option.
In the Money (ITM) – Option has intrinsic value.
Out of the Money (OTM) – Option has no intrinsic value yet.
At the Money (ATM) – Strike price equals current market price.
Options give traders flexibility, leverage, and hedging power. But with great power comes great “margin calls” if you misuse them.

Part7 Trading Master ClassOption Chain Key Terms
Let’s go deep into each term one by one.
Strike Price
The predetermined price at which you can buy (Call) or sell (Put) the underlying asset if you exercise the option.
Every expiry has multiple strike prices — some above the current market price, some below.
Example:
If NIFTY is at 19,500:
19,500 Strike → ATM (At The Money)
19,600 Strike → OTM (Out of The Money) Call, ITM (In The Money) Put
19,400 Strike → ITM Call, OTM Put
Expiry Date
The last trading day for the option. After this date, the contract expires worthless if not exercised.
In India:
Index options (like NIFTY, BANKNIFTY) → Weekly expiries + Monthly expiries
Stock options → Monthly expiries
3.3 Call Option (CE)
Gives you the right (not obligation) to buy the underlying at the strike price.
Traders buy calls when they expect the price to rise.
3.4 Put Option (PE)
Gives you the right (not obligation) to sell the underlying at the strike price.
Traders buy puts when they expect the price to fall.

Part11 Trading Master ClassOption Chain Key Terms
Let’s go deep into each term one by one.
Strike Price
The predetermined price at which you can buy (Call) or sell (Put) the underlying asset if you exercise the option.
Every expiry has multiple strike prices — some above the current market price, some below.
Example:
If NIFTY is at 19,500:
19,500 Strike → ATM (At The Money)
19,600 Strike → OTM (Out of The Money) Call, ITM (In The Money) Put
19,400 Strike → ITM Call, OTM Put
Expiry Date
The last trading day for the option. After this date, the contract expires worthless if not exercised.
In India:
Index options (like NIFTY, BANKNIFTY) → Weekly expiries + Monthly expiries
Stock options → Monthly expiries
Call Option (CE)
Gives you the right (not obligation) to buy the underlying at the strike price.
Traders buy calls when they expect the price to rise.
Put Option (PE)
Gives you the right (not obligation) to sell the underlying at the strike price.
Traders buy puts when they expect the price to fall.
