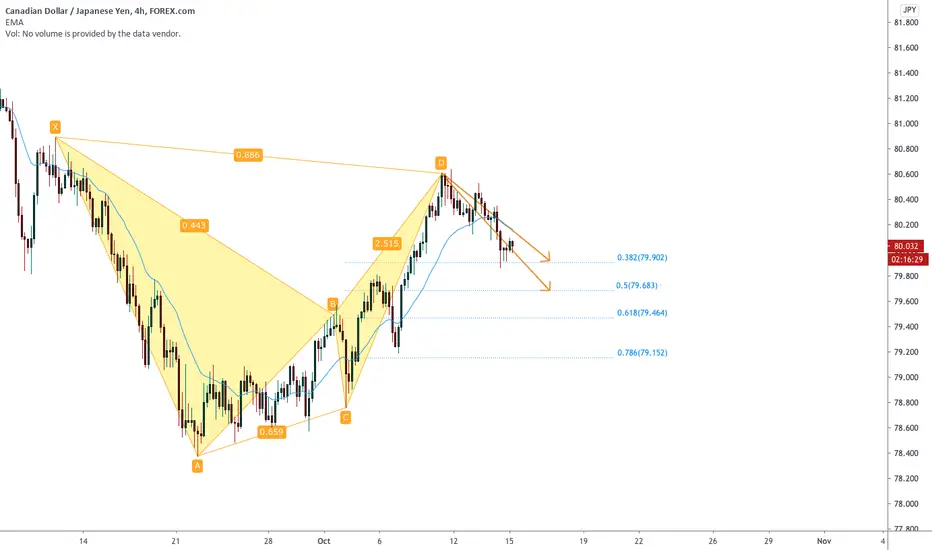
The Bat pattern is similar to the Gartley pattern in that it is a retracement and continuation pattern that occurs when a trend temporarily reverses its direction but then continues on its original course.
It gives you the opportunity to enter the market at a good price, just as the pattern ends and the trend resumes.
The Bat's main difference to the Gartley pattern is where it completes – at an 88.6% Fibonacci retracement of the X-A leg. Its inner retracements are also slightly different.
As with many patterns, there is a bullish and a bearish version of the Bat.
X-A
In its bullish version, the first leg forms when the price rises sharply from point X to point A. This is the pattern's longest leg.
A-B
The A-B leg then sees the price change direction and retrace 38.2% to 50% of the distance covered by the X-A leg.
Note that the A-B leg can never retrace beyond point X – if it does, the pattern is no longer valid.
B-C
In the B-C leg, the price changes direction again and moves back up, retracing anything from 38.2% to 88.6% of the distance covered by the A-B leg. If it retraces up beyond the high of point A, the pattern becomes invalid.
C-D
The C-D leg is the final and most important part of the pattern. As with the Gartley pattern, this is where the Bat pattern completes and you place your long (buy) trade at point D.
With the Bat pattern, however, you look to place your trade entry order at the point where the C-D leg has achieved an 88.6% retracement of the X-A leg. Ideally, point D should also represent a 161.8% to 261.8% extension of the B-C leg.
Disclaimer
The information and publications are not meant to be, and do not constitute, financial, investment, trading, or other types of advice or recommendations supplied or endorsed by TradingView. Read more in the Terms of Use.
Disclaimer
The information and publications are not meant to be, and do not constitute, financial, investment, trading, or other types of advice or recommendations supplied or endorsed by TradingView. Read more in the Terms of Use.