Hi All,
The story continues and hence an continuation post and the link supplied below.
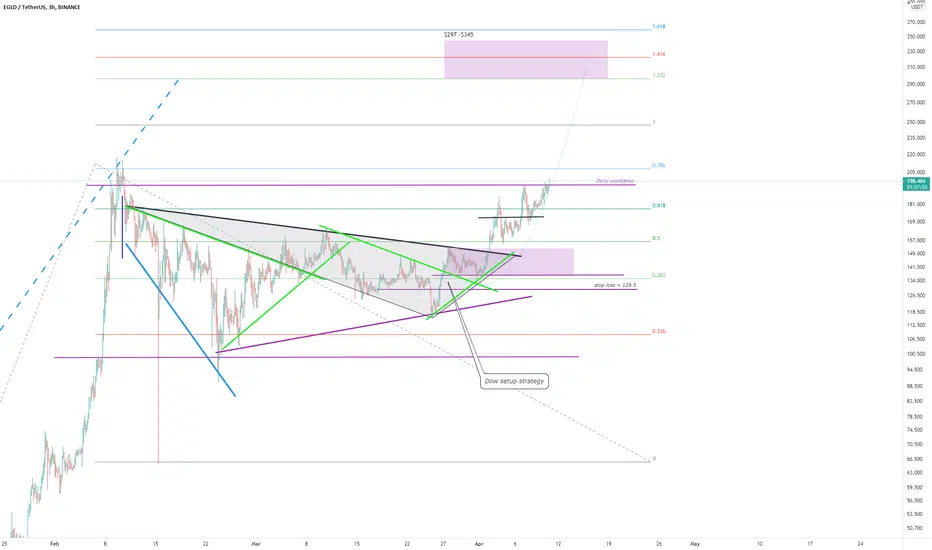
Another ALT cleared to move on now.
It seems I stumbled on a setup I did not see as part of a bigger picture, hence always learning.
On the chart, I have made some reference points so you can look at this and the previous post to understand the structure and why it was a good accumulation zone.
1 last chance maybe on the retest to get it low.
All the best
S.SAri

PREVIOUS POST

The story continues and hence an continuation post and the link supplied below.
Another ALT cleared to move on now.
It seems I stumbled on a setup I did not see as part of a bigger picture, hence always learning.
On the chart, I have made some reference points so you can look at this and the previous post to understand the structure and why it was a good accumulation zone.
1 last chance maybe on the retest to get it low.
All the best
S.SAri
PREVIOUS POST
Discord: discord.com/invite/vb4hbP88vb (TradeToProspa)
Telegram: t.me/TprospaTradersbot
This community has signals now but with no risk management comms.
Telegram: t.me/TprospaTradersbot
This community has signals now but with no risk management comms.
Related publications
Disclaimer
The information and publications are not meant to be, and do not constitute, financial, investment, trading, or other types of advice or recommendations supplied or endorsed by TradingView. Read more in the Terms of Use.